When it comes to installing a new roof, one of the most important steps is ensuring that the drip edge is properly installed. The drip edge is a metal flashing that is installed along the roof’s edges to help prevent water from seeping under the roofing material and causing damage to the roof deck and fascia.
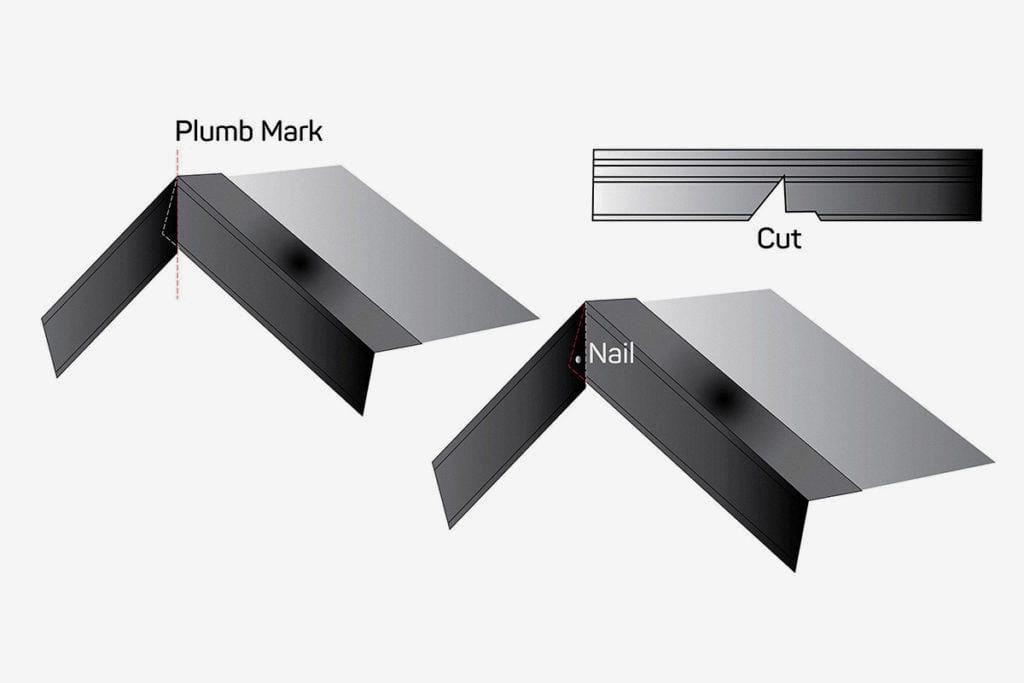
One critical aspect of drip edge installation is ensuring that the pieces overlap correctly. When installing a new drip edge, it is important to ensure that each piece overlaps the previous piece by at least 1 inch. This overlap helps to create a continuous barrier that prevents water from getting under the roofing material and causing damage.
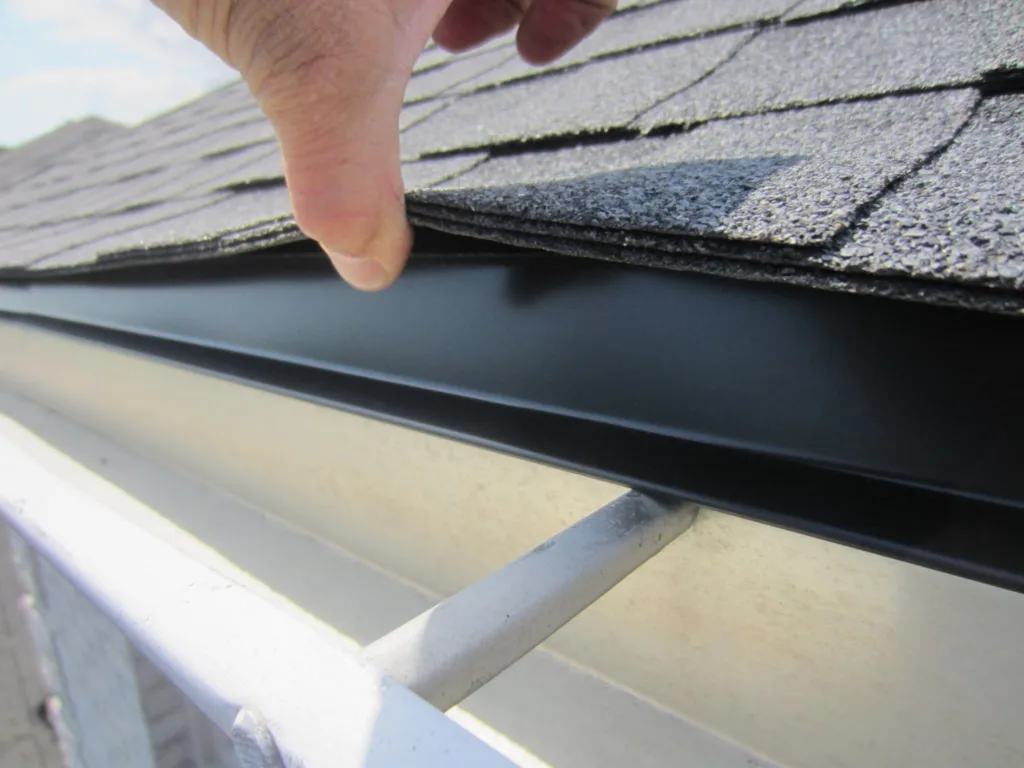
In addition to ensuring that each piece overlaps correctly, it is also important to make sure that the face of the drip edge is overlapping the gutter. This ensures that any water that runs off the roof is directed into the gutter and away from the fascia board. Without this overlap, water could seep between the gutter and the fascia, causing rot and other damage.
When nailing the drip edge in place, it is recommended to nail it eery 12 inches. This helps to ensure that the drip edge is securely fastened to the roof and will not become loose or dislodged over time. It is also important to make sure that there are no gaps between the drip edge and the roof deck, as these gaps can allow water to seep under the roofing material.
Ensuring that the drip edge is properly installed and overlaps correctly is essential for protecting your roof and preventing water damage. By following these guidelines and taking the time to properly install the drip edge, you can help ensure the long-term health and durability of your roof.
How Much Overlap is Necessary for Drip Edge?
When installing drip edge, it’s important to overlap each piece properly to ensure a watertight seal. The general rule of thumb is to overlap the next drip edge piece by at least one inch over the previous one. This ensures that water will run off the roof and into the gutters without seeping underneath the drip edge. It’s also important to nail the drip edge every 12 inches to ensure it’s securely attached to the roof. If the distance beween nails is greater than 16 inches, the drip edge may not be strong enough to withstand strong winds or heavy rainfall. proper installation and overlapping of drip edge is crucial to protecting your roof and home from water damage.

The Benefits of Overlapping Drip Edge and Gutter
The drip edge should overlap the gutter. The purpose of a drip edge is to prevent water from getting underneath the shingles and into the roof deck or fascia board. If the drip edge is not overlapping the gutter, water can seep betwen the gutter and fascia, causing damage to the fascia and potentially leading to water damage inside the home. Therefore, it is crucial to ensure that the drip edge is properly installed and overlapping the gutter so that water is directed away from the roof and into the gutter system. By doing so, you can help protect your home from water damage and prolong the life of your roof.
How Much Overlap is Necessary for Flashing?
Flashing is an essential component of a roofing system that prevents water from penetrating through the joints and seams. The overlap of flashing is crucial to ensure effective water shedding and prevent leaks. The amount of overlap required for flashing varies depending on the application and the angle of the surface. For vertical faces, such as wall flashing, a minimum overlap of 2 inches is recommended. This allows for adequate coverage and ensures that water does not penetrate through the joint. However, for conditions where water must be shed, such as valley flashing, a minimum overlap of 6 inches is recommended. This larger overlap povides extra protection against water infiltration and ensures that the flashing can effectively shed water away from the surface. It is essential to follow these minimum overlap requirements to ensure proper installation and prevent potential water damage to the building.
The Importance of Ensuring Shingles are Flush with Drip Edge
Shingles should be installed over the drip edge with a minimum overhang of 3/8” (9 mm) at both the eave edge and the rake edge. However, if the drip edge extends out from the rakes and eaves, typically called DL Style or D Type, then the shingles may be installed flush with the drip edge. It is important to note that installing shingles flush with the drip edge may increase the risk of water infiltration dring heavy rains or wind-driven rain. Therefore, it is recommended to follow the manufacturer’s installation guidelines and local building codes to ensure proper installation and maximum protection for your roof.
Extent of Drip Edge Into Gutter
When it comes to installing a drip edge on your roof, it is important to know how far it should extend into the gutter. The general rule of thumb is that the drip edge should extend into the gutter by abot 1/4 to 1/2 inch. This ensures that water will flow into the gutter and not behind it, which could cause damage to your roof and fascia.
To install the drip edge correctly, make sure it is flush against the roof deck and extends over the edge of the roof by about 1 inch. Then, carefully slide the drip edge into the gutter, making sure it is snug against the fascia board. Use screws or nails to secure it in place, making sure there are no gaps between the drip edge and the gutter.
Proper installation of a drip edge is crucial for protecting your roof from water damage, so be sure to take your time and follow these guidelines carefully. If you are unsure about how to install a drip edge or need assistance, it is always best to consult with a professional roofer.

Source: iko.com
How Much Overlap is Necessary for Gutters?
When installing gutters, it is important to have a proper overlap at each joint to ensure a secure and leak-free connection. Generally, it is recommended to have six to eigt inches of overlap at each joint. This means that when you join two sections of gutter together, one end should slide into the other by at least six to eight inches. This overlap will help to prevent water from seeping through the joint and causing damage to your home. It is also important to note that gutter and downspout sections are typically sold in ten-foot lengths, so you should plan your installation accordingly to ensure that you have enough material to complete the job.
How Much Should Gutters Overlap?
When joining two sections of gutter, they should overlap by at least 8 inches. This overlap ensures that water will not seep through the joint and leak onto the ground below. Additionally, it is recommended to use a 3/8-inch-long, self-tapping, stainless steel screw or pop rivet to secure the joint. These fasteners should be placed in two rows of four each to provide adequate support and stability to the gutter system. By following these guidelines, you can ensure that your gutters are properly installed and will effectively channel water away from your home.
Conclusion
Proper installation of drip edge overlap is critical to ensure the overall longevity and durability of your roofing system. As a general rule, it is recommended to nail the drip edge every 12 inches and avoid having more than 16 inches between nails. Additionally, it is essential to ensure that the face of the drip edge is overlapping the gutter by at least an inch to prevent water from seeping in between the gutter and fascia and causing potential rot or damage. By following these guidelines, you can prevent potential leaks and oher issues that may arise due to improper drip edge overlap installation. Remember, taking the time to install drip edge correctly can save you time and money in the long run.
